This guide will explain in detail how to add your first product in the APSDAI system, including the meaning and configuration of each parameter.
Product List Overview
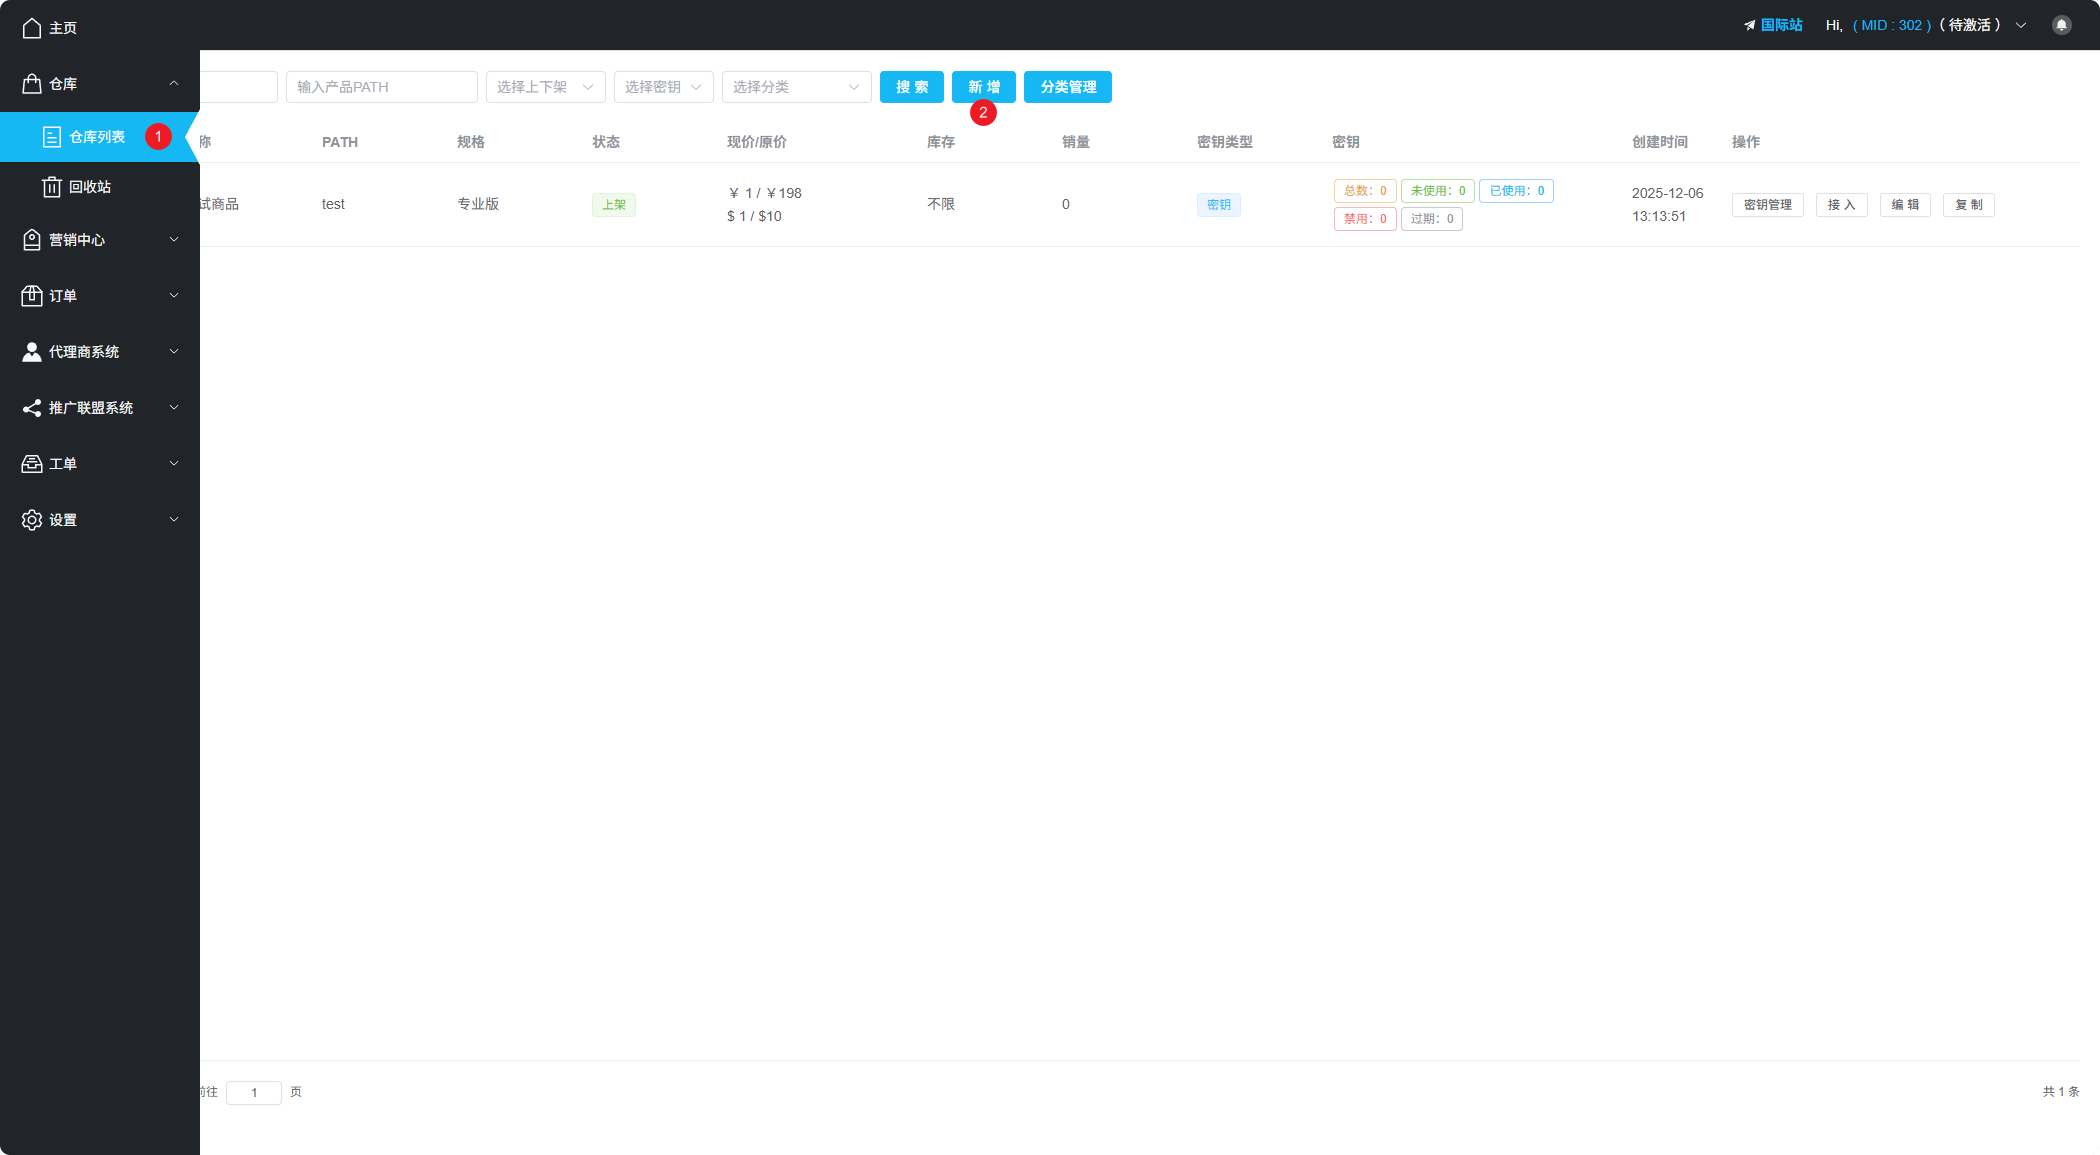
In the APSDAI Merchant Center's Warehouse List, you can see that the system has added a sample product by default to help you quickly understand the product display effect.
Basic Information Configuration
After clicking "New Product", you will see the product configuration page. Below is a detailed explanation of each parameter:

| Parameter | Description |
|---|---|
| Logo Image | Recommended to upload a 512×512px PNG format image for best display |
| Name | Your software product name |
| PATH | Unique product identifier, auto-generated by system, can be manually changed to numbers or letters. Cannot be modified after saving |
| Theme Color | Main color of the payment popup, recommended to match your website theme or logo color |
| Description | Optional, will be displayed in the "Affiliate Program" product list |
| Resource Pack URL | Optional, for affiliates to download promotional materials |
Pricing Settings
Price Configuration
Set the product's current price and original price (for displaying strikethrough price).
Inventory Management
By default, inventory is set to "Unlimited". To set a fixed inventory quantity:
- Switch to "Inventory" mode
- Enter the inventory quantity
- Enable notification to receive alerts when inventory is low
License Key Warehouse
After selecting a warehouse for your product, once the product is created, a "Key Management" entry will appear in the warehouse list. Click to add license key inventory for the product.
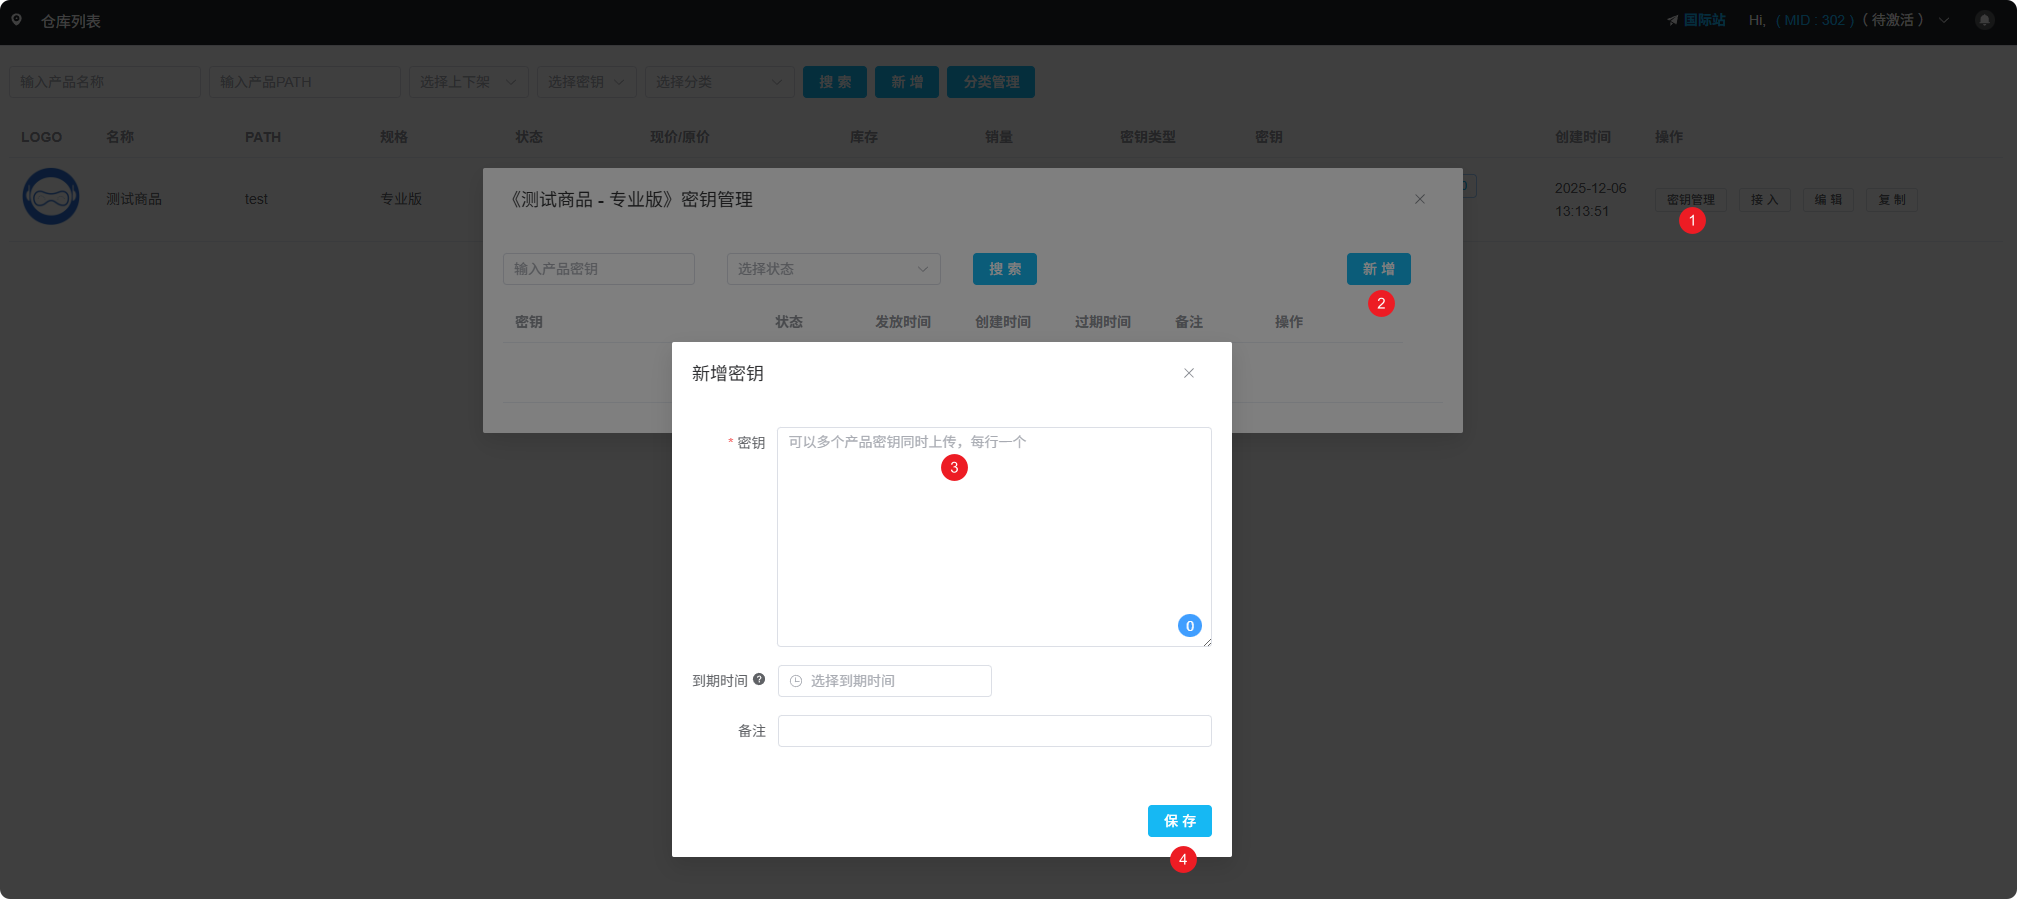
Key Types
Advanced Configuration
Category Management
If you sell many products, you can create category groups for easier maintenance and management.
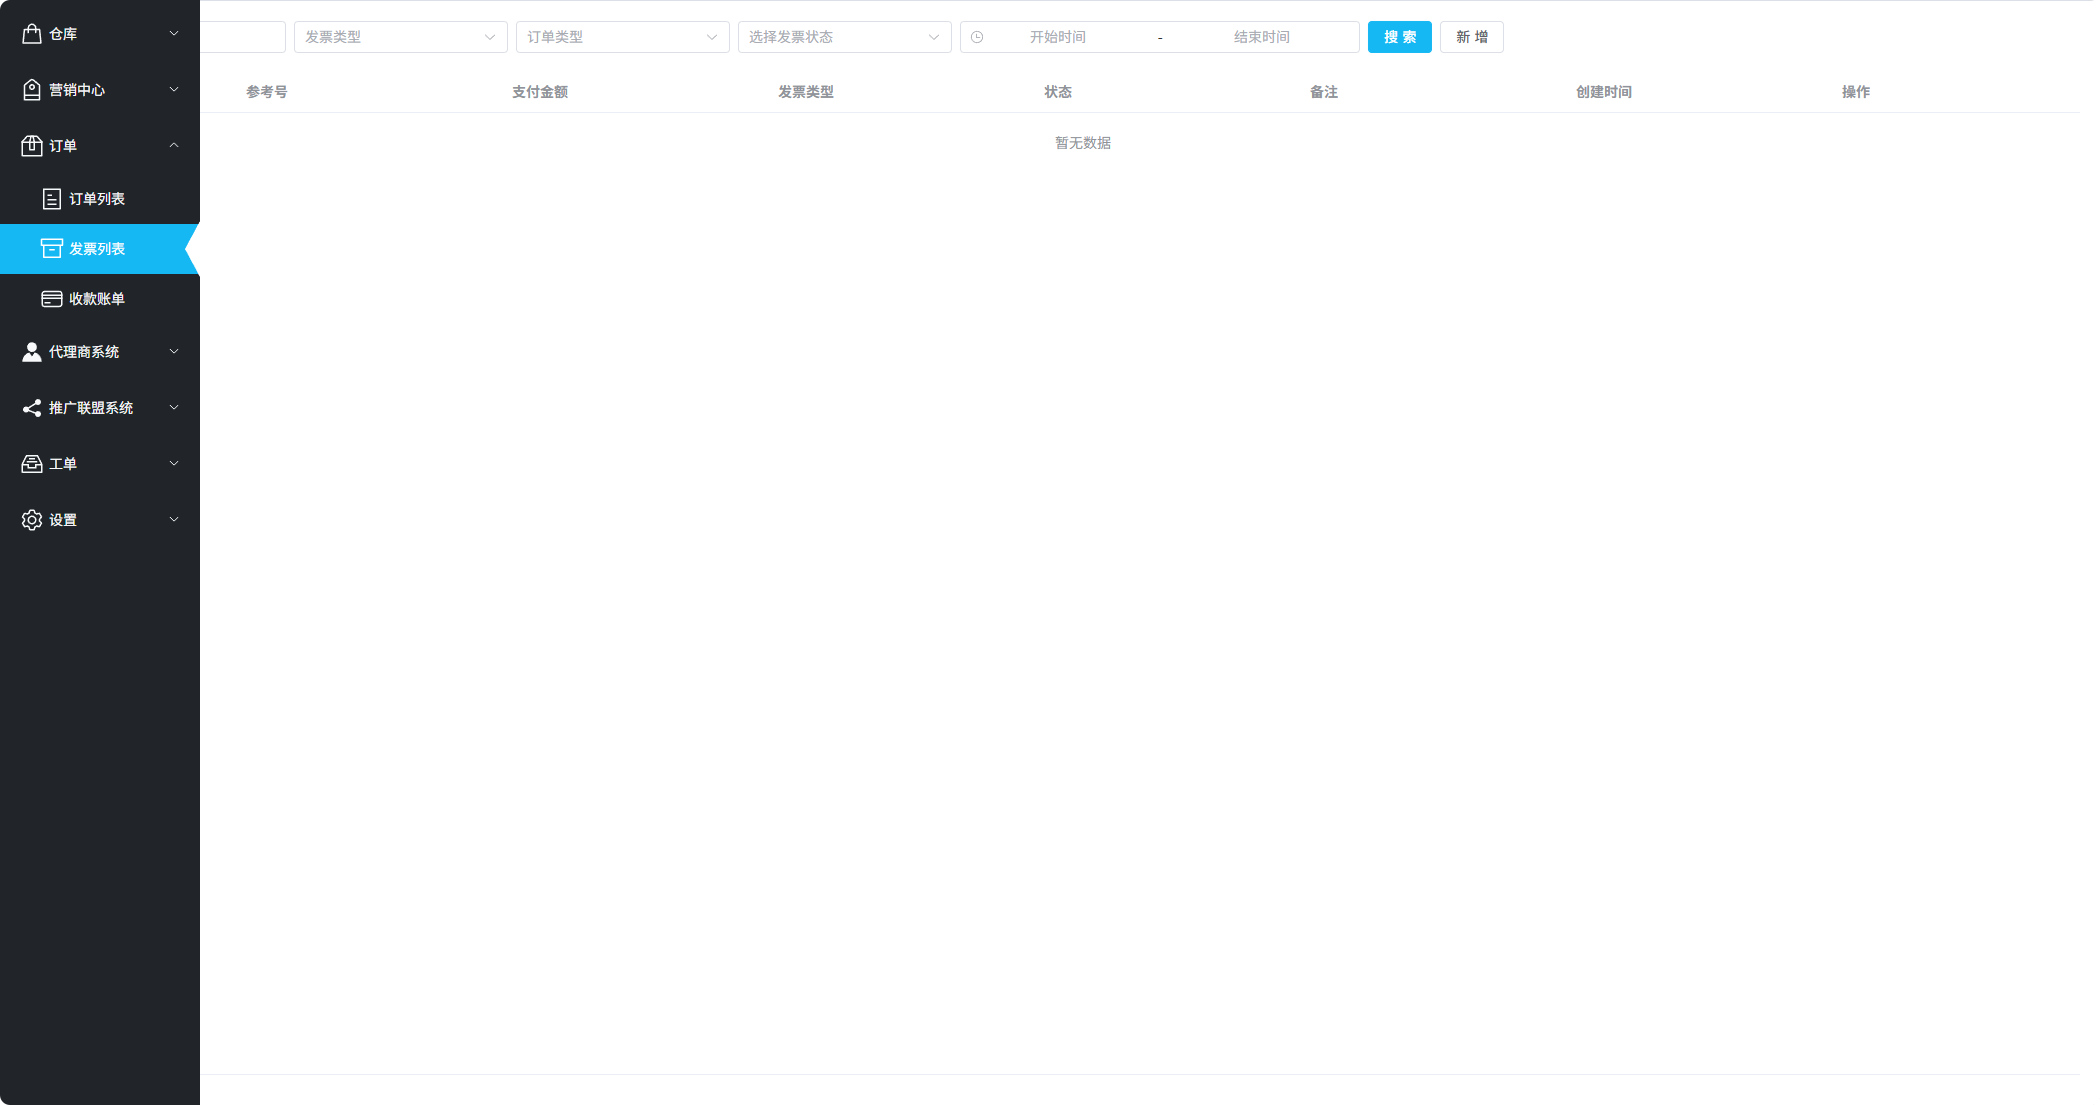
Invoice Feature
Disabled by default. When enabled, an invoice entry will appear on the checkout page, allowing users to fill in invoice information when ordering. You can view and process all invoice requests in "Orders - Invoice List".
Download & Guide
| Configuration | Description |
|---|---|
| Download URL | After payment, this download link will be displayed on the payment completion page and order email. Can be your software download page URL |
| Guide URL | Software installation and activation tutorial link to help users complete the setup process |
| Order Confirmation | Terms or notes that users must check and confirm before placing an order |
Parameter Collection
Used to collect necessary user information in orders. Parameter names should not exceed 5 characters.
Supported Parameter Types
- String - Text input
- Number - Numeric input
- Image - Image upload
- Attachment - File upload
Collection Timing
Next Steps
After adding your product, you can:
- Configure Payment API Parameters
- Set up automatic delivery rules
- Enable the affiliate program
- Perform payment testing